Makina-Corpus
Plomino
Features reference
Formulas
Formulas are Python scripts. Example:
return plominoDocument.getItem('price') * 15
returns the value of the price item multiplied by 15.
If the price item doesn’t exist, getItem will return None, and
the formula will raise an exception. The exception is swallowed and the
formula returns None as well. If the Plomino database is running in
debug mode, the exception will be logged. If the price item contains
a string or a truth value instead of a number, you’ll also get an exception.
Plomino needs to be coded defensively!
Note
a formula does not necessarily need to return a value – you may just need to make some changes in some documents (for instance if it is the formula in a Plomino action), so the return value would be irrelevant.
plominoDocument is a reserved name which corresponds to the
current document on which the formula is evaluated.
plominoContext is a reserved name which corresponds to the
context in which the formula is evaluated. In some cases the formula is
executed on an object which is not a Plomino document (but a view,
or a form, for instance).
Note
Technically, plominoDocument and plominoContext are just targeting
the very same object, which is the Zope context. plominoDocument,
plominoContext, context can be used identically.
Besides these names, many functions defined in PlominoUtils are
available within the context of a formula.
Document items should be accessed using the getItem() method:
plominoDocument.getItem('validationDate').
To change an item value, use the setItem() method:
plominoDocument.setItem('firstname', 'Eric')
You can access the parent Plomino database of the document (or view, or
form, according the context) using the getParentDatabase() method.
You can also access the views and the other documents. Example:
db = plominoDocument.getParentDatabase()
view = db.getView('pendingPurchases')
total = 0
for doc in view.getAllDocuments():
    total = total + doc.getItem('price')
return total
(this example computes the total amount for the pending purchase requests).
You can check the current user rights or roles. Example:
db = plominoDocument.getParentDatabase()
member = db.getCurrentMember()
if db.hasUserRole(member.id, '[Expert]'):
    return True
elif db.isCurrentUserAuthor(doc):
    return True
elif 'PlominoEditor' in db.getCurrentUserRights():
    return True
else:
    return False
You can change the author access rights on a given document by modifying
its Plomino_Authors item.
This item is created automatically for any document and contains the user id of the document creator. If you want your document to be editable by users other than its creator, it can contain other ids as well. Example:
authors = plominoDocument.getItem('Plomino_Authors')
authors.append('[Expert]')
if not 'inewton' in authors:
    authors.append('inewton')
plominoDocument.setItem('Plomino_Authors', authors)
As you can see in this example, you can add user ids and/or user roles.
For a better understanding of the methods available on Plomino objects, see below in this document.
Names defined in formulas
plominoContext,plominoDocument- The execution context of the formula.
parent_form_ids- Plomino sets the
parent_form_idskey on theREQUEST, which contains a cumulative list of all the forms rendered, with the most recent form last. This allows fields on subforms to figure out what form they were rendered from. script_id- The computed id of the executing script, e.g.
field_-_frmTime_-_work_type_-_formula. SeeSCRIPT_ID_DELIMITER. SCRIPT_ID_DELIMITER- The delimiter used in computation of script ids. To split a script into its
component parts, you can do
script_id.split(SCRIPT_ID_DELIMITER).
Adaptive formulas
Since a formula can figure out what form and field it was called on by examining the name of its script, it can adapt to the context.
For example, to create a selection field which is initialised to select all its values by default, you can set the default formula as follows:
#Plomino import libConfig
return libConfig_getFieldValuesAsDict().keys()
This assumes a script library libConfig providing functions as follows:
def libConfig_getFieldValuesAsDict():
    """ Find the config key based on the calling script name
    """
    field_id = libConfig_getFieldId(script_id)
    return libConfig_getValuesAsDict(field_id)

def libConfig_getFieldId(script_id):
    """ Parse field id from script id

    Turn this: `field-_-frmConfiguration-_-pool_construction_date-_-formula`
    into this: `pool_construction_date`
    """
    script_type, form_id, rest = script_id.split(SCRIPT_ID_DELIMITER, 2)
    field_id, formula = rest.rsplit(SCRIPT_ID_DELIMITER, 1)
    #DBG Log('field_id: %s' % field_id, 'libConfig_getFieldId')
    return field_id

def libConfig_getValuesAsDict(key):
    """ Look up a config value by name, return the value as a dictionary, splitting each line on `separator`.

    If the selection is `['key|value', ...]`, return `{key: value, ...}`.
    """
    selection_list = libConfig_getSelectionList(key)
    d = {}
    for row in selection_list:
        (label, selection_key) = row.split(separator)
        d[selection_key] = label
    #DBG Log('values for %s: %s' % (key, `d`), 'libConfig_getValuesAsDict')
    return d

def libConfig_getSelectionList(key):
    """ Get the selection list for this field.

    This will return either:
    - the literal value or
    - the result of the selection formula, if there is one.
    """
    selection_list = []
    form_field = frmConfig.getFormField(key)
    if form_field:
        selection_list = form_field.getSettings().getSelectionList(config)
    return selection_list
Actions
By default, Plomino offers a few standard actions (Exit, Save, Delete, Edit, etc.) depending on the object type (document, view, form), on the current mode (read mode or edit mode), and on the user access rights.
To improve the application usability, you may need to add more actions in the forms or in the views.
To create an action, select Plomino: action in the Add item
Plone menu.
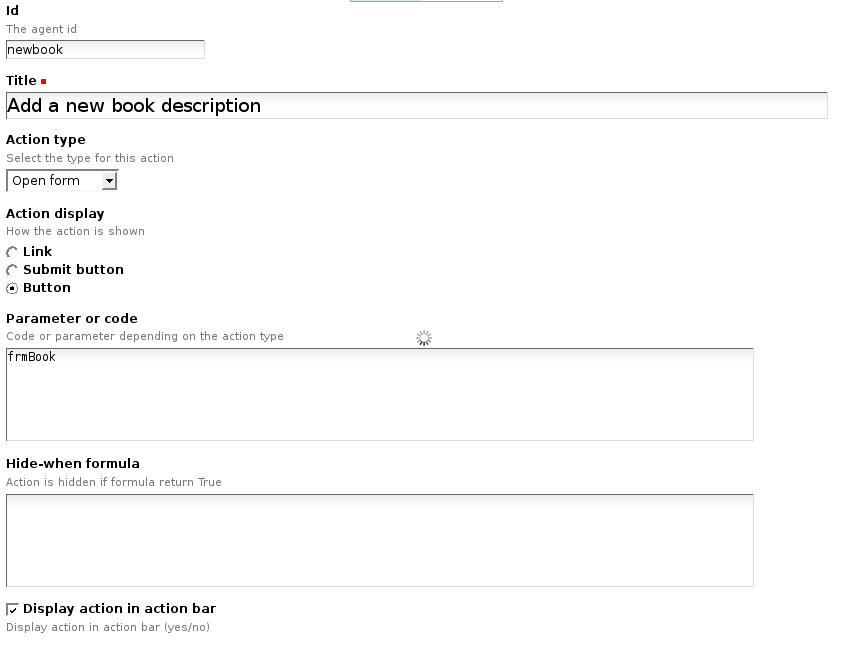
Enter an identifier and a title.
Then select the action type:
- Open form: open the form indicated by the
Parameter or
code
parameter to create a new document. - Open view: open the view indicated by the
Parameter or
code
parameter. - Close: go back to the database home page.
- Save: submit the form with its current content, and save (or create) the document.
- Python script: run the formula entered in
Parameter or
code
, and redirect to the current object (in read mode). Examples: send a mail notification to someone, compute a field value and update the document with this new value, etc. If the formula returns a string, Plomino will assume it is a URL and use it for redirection. - Redirect: similar to
Python script, but the formula is executed before the document is rendered, not when the button or link is clicked. The script should return an URL which is used as a link or button target. By including URL parameters in the returned URL, it can be used to links to a form with fields pre-filled. A better name for this action type may be Computed link.
You can add a hide-when formula to control when the action should be visible or not.
If you select Display action in action bar, the action will be displayed together with the standard Plomino actions in the action bar.
But (in forms only) you can also choose to insert the action within the form layout directly.
With Tinymce, actions can be created and inserted directly in the form layout from the editor.
Example:
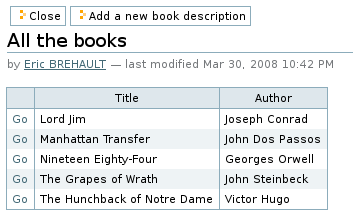
With kupu, you must use the Plomino action style, and the action will be rendered according the Action display parameter (link, submit button, or button).
Example:
Result:
Fields
Computed fields
In a form, the fields where the user can enter data are in edit mode. Upon form submission, user-submitted fields are set on the document before computed fields are evaluated.
You might also need to use fields which can not be changed by the user. Here are the other modes offered in Plomino:
- Computed
- the field value is computed with a formula each time the document is opened, and it is saved each time the document is saved.
- Computed on creation
- the field value is computed only once, the first time the document is saved.
- Computed on save
- the field value is computed and stored each time the document is saved.
- Computed for display
- the field value is computed each time the document is opened, but it is not saved.
Example: create a Computed for display field with this formula:
category = plominoDocument.getItem('bookCategory')
if category:
    index = plominoDocument.getParentDatabase().getIndex()
    others = index.dbsearch({'bookCategory': category})
    result = "There are %s other books in the same category" % len(others)-1
    return result
return ""
and insert it in the frmBook form:
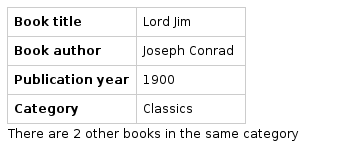
A Computed for display field with no formula specified will render the item with the corresponding id, if it exists.
Note
If your computed field A depends on computed field B, the formula for A needs to compute B first. This will result in B being computed twice, so consider caching if needed.
Note
Commenting out parts of a form by editing the HTML hides that from the browser, but not from Plomino: if the commented part(s) contain computed fields, they will still be computed.
Validation
By default, Plomino validates fields according to their type (for instance, letters are not allowed in a Number field).
You can also add more validation criteria in the field’s Validation tab:
- a field can be mandatory: if the field is empty when the document is saved, Plomino does not save the document and displays an alert to the user.
- you can enter a formula to implement a specific validation rule (which may depend on other field values).
For instance, in a Purchase request application, the maximum authorised
amount is 1000 euros. You would enter the following formula in the
TotalAmount validation field:
if plominoDocument.getItem('TotalAmount') >= 1000:
    return 'The total amount must be under 1000 euros'
else:
    return ''
If you need to compare the submitted values to the currently stored state of the document, you need to look up the stored document first:
db = plominoDocument.getParentDatabase()
plominoDocument_stored = db.getDocument(plominoDocument.id)
Note
the formula must return an empty string if validation succeeds or an error message if it does not.
Doclinks
A Doclink field allows a Plomino document to reference another document.
The doclink stores the path to the targeted document, and it is displayed as a link.
You may use a view as the source of possible targeted documents.
Example
We have a Contact form allowing users to enter contact information about company employees.
The view allcontacts returns all the contact documents:
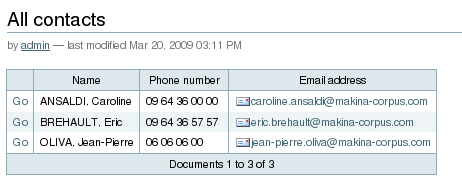
We add a doclink field, named manager, in the Contact form to enter
the corresponding manager of each employee.

It uses the allcontacts view as its document list source, and
displays the name column value as label:
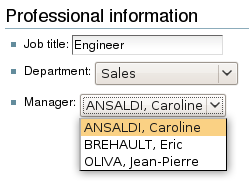
In read mode, the field displays a link to the corresponding document:
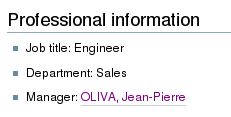
If you choose the Embedded view widget, the field displays the view
itself (including all columns), with a checkbox to select documents:

Instead of using a view, you can compute the document list using a formula (which will override the Embedded view widget), so you can filter the documents you want to list, you can retrieve documents from another database, or even list Plone objects which are not Plomino documents. For example:
contactsdb = plominoDocument.restrictedTraverse("/Plone/demo/contacts")
view = contactsdb.getView('allcontacts')
return [d.lastname+"|"+d.getPath() for d in view.getAllDocuments()]
Note
in this example, we use the getAllDocuments method to get the
documents list, this method returns Catalog brains.
To improve performance, the lastname field has been added to the
index, so there is no need to wake up the objects (using
getObject), and we use the getPath method to get the path of the
real object.
Field templates
You can create a custom template to render a field in a different way than the regular field widgets.
The field template must be added in the Resources folder in the ZMI (go to Design tab / Others / Resources folder) as a Page Template.
To be applied, the template id must be then entered in the Field read template or in the Field edit template.
The template code can be copied from the Plomino products sources (CMFPlomino/skins/cmfplomino_templates/**FieldEdit.pt or **FieldRead.pt).
Here is an example showing a multi-categorized tag field:
Edit template:
<span tal:define="
    field options/field;
    db options/field/getParentDatabase;
    categories python:
        [doc.getObject() for doc in db.getView('tags').getAllDocuments()]
    ">
<table><tr>
<tal:loop repeat="cat categories">
    <td valign="top" tal:define="
        c cat/tagCategory;
        tags cat/tagList
        ">
    <span tal:content="c">category</span>
    <select tal:attributes="name options/fieldname"
        multiple="true"
        lines="4">
    <tal:block repeat="v python:
        [t+'|'+c+':'+t for t in tags.split(',')]
        ">
        <tal:block define="
            current options/fieldvalue;
            l python:v.split('|')
            ">
            <option tal:attributes="
                value python:l[1];
                selected python:test(current and l[1] in current,1,0)
                "
                tal:content="python:l[0]">value</option>
        </tal:block>
    </tal:block>
    </select>
    </td>
</tal:loop>
</tr>
</table>
</span>
Result:

Read template:
<tal:block tal:repeat="v options/selection">
    <tal:block define="
        current options/fieldvalue;
        l python:v.split('|')
        ">
        <tal:block condition="
            python:test(current and l[1] in current,1,0)">
            <tal:block define="
                v python:l[0];
                cat python:v.split(':')[0];
                t python:v.split(':')[1]
                ">
        <br/><span class="discreet" tal:content="cat">category</span>
        <span class="callout" tal:content="t">category</span>
            </tal:block>
        </tal:block>
    </tal:block>
</tal:block>
Result:
Filling fields from the REQUEST
Editable fields which are not part of the layout take their value from the
REQUEST.
So, for example, if you want to pass a parameter to another form:
- in the origin document, put the parameter(s) in the link to the target
form, e.g. by adding
?param1=value¶m2=valueto the URL. This will cause the parameter to be part of theGETrequest which retrieves the target form. - in the target form, create an editable field with the same id as the
parameter key (e.g.
param1andparam2above), but do not insert it in the form layout. The field will get its value from theREQUEST. - then you can create Computed on save (or on display, or whatever) fields which use the value of this field.
Field labels
Form layouts may contain field labels. See `field labels`_ below.
HTML attributes injection
The HTML attributes formula parameter allows to enter a formula in charge of returning a string that will be injected in the field tag element.
A typical example could be:
'placeholder="Enter the book title here"'
But it also be a good way to enable Mockup pattern-based widgets:
'class="pat-select2" data-pat-select2="width:20em"'
or basically any HTML attributes a Javascript library or a CSS grid might expect.
Note
the attributes are inserted just before ‘id=”field_id”’ if it exists.
Forms
Document id and title formulas
- Document title formula
- Compute the document title
- Compute document title on view
- Execute the document title formula whenever the document is rendered
- Store dynamically computed title
- Store the computed title (if different from the stored value) every time the document is rendered. (Watch out, this can become a hotspot if it causes many writes.)
- Document id formula
- Compute the document id at creation. (Undergoes normalization.)
Field labels
A field label corresponds to a field.
To create a label, add text with the format fieldid: Label
or just fieldid to the layout, select this text,
and select the Plomino Label style from the TinyMCE styles dropdown.
The fieldid has to correspond to a field in the layout.
If no label is specified (i.e. fieldid), the field title is used as the label.
In edit mode, labels for single-input fields are rendered as an HTML
<label for='FIELDID'>LABEL</label> element.
In read mode, labels for single-input fields are rendered as an HTML
<span class='label' title='Label for FIELDID'>LABEL</span> element.
In edit mode, labels for composite fields such as checkboxes, radio buttons,
and picklists are rendered as a
<fieldset><legend>LABEL</legend>...</fieldset> structure,
wrapping the target field.
In read mode, labels for composite fields are rendered as a
<div class='fieldset'><span class='legend' title='Legend for FIELDID'>LABEL</span>...</div>
structure.
Note that label elements are rendered in-place
(which may be anywhere in the layout),
while fieldset elements are rendered around the target field.
Events
In a Plomino form, you can use the following events:
onOpenDocumentexecuted before document is opened (in both read mode and edit mode)
If the formula for this event returns a false value, opening is allowed; but if it returns a true value, e.g. a string, opening fails, and the value is displayed as an error message.
beforeSaveDocument- executed before submitted values are stored into the document. Submitted
values can be found in
context.REQUEST. onSaveDocument- executed after editable and computed items have been stored, and before document is re-indexed.
onDeleteDocument- executed before document is deleted
onCreateDocument- executed before the document is saved for the first time
(
onSaveDocumentwill also be executed, but afteronCreateDocument) beforeCreateDocument- executed before a blank form is opened.
In the Events tab, you can enter the formulas for each event you need.
Example: enter the following formula for the onSaveDocument event:
date = DateToString(DateTime())
db = plominoDocument.getParentDatabase()
user_name = userFullname(db, db.getCurrentMember())
plominoDocument.setItem(
    'history',
    plominoDocument.getItem('history') +
    "This document has been modified by "+user_name+" on "+date)
It will update the history item which logs all the modifications,
authors and dates.
Hide-when formulas
In a form, it might be useful to hide or display some sections according different criteria (an item value, the current date, the current user’s access rights, etc.).
To do so, you must use Hide-when formulas.
Select Plomino: hide when in the Add item Plone menu.
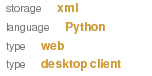
Enter an identifier, a title, and a formula. Example:
plominoDocument.bookState == 'Damaged'
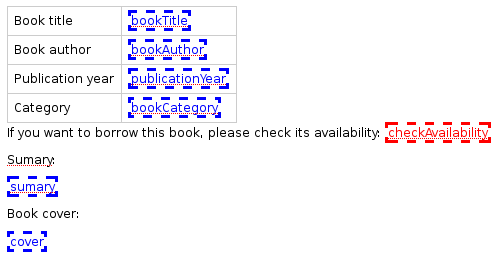
Then, modify the form layout to insert the hide-when formula in the form
layout. Enter the following: start:hide-when-identifier
at the beginning of the area to hide. And the following at the end:
end:hide-when-identifier
And apply the Plomino Hide-when formula style to those 2 bounds:
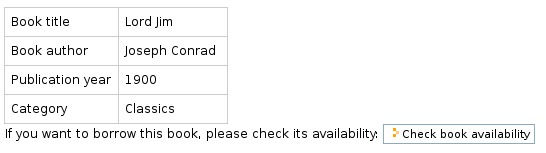
If the hide-when formula returns True, the enclosed area will be
hidden. If it returns False, the area is displayed (in our example: if
the book is damaged, it cannot be borrowed, so we hide the action to check
the book availability).
Hide-when formulas can be inserted directly in the form layout using TinyMCE.
Sub-forms
An application can contain several forms.
In the Book library example, we could add a CD form and a Video form. Those two forms would probably have several similar fields (availability, last borrower, return date, etc.).
To avoid having to build (and maintain) the same things several times, you can use sub-forms.
The sub-form principle is to insert a form within another form.
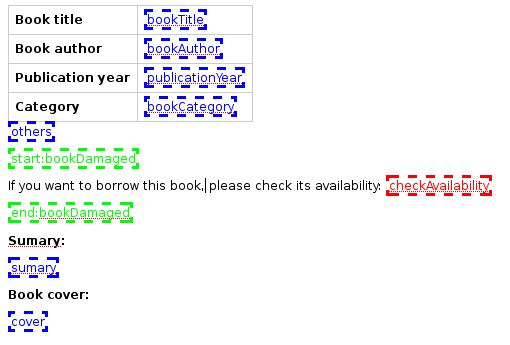
In our example, we create a borrowInfo form containing the
borrower name, the return date, and the availability, and we insert it
as a sub-form in frmBook, frmCD and frmVideo.
The form is inserted using the Plomino Subform style in Kupu:
Sub-forms can be inserted directly in the form layout using TinyMCE.
Note
as you probably do not want borrowInfo to be displayed in the
database home page, you have to check Hide in menu in the
form Parameters tab.
Note
Some fields type are computed independently of rendering, namely
COMPUTED, COMPUTEDONSAVE and CREATION. In the case of
sub-forms, if multiple sub-forms have fields with the same id as the
including form, or other included forms, those fields will be found
multiple times. Plomino handles this case by picking the first
occurrence of the field, and logging the ambiguity (at the WARNING
log level).
Search formula
When you create a search form, Plomino uses the form fields to do a default ZCatalog search among the documents of the view associated with the search page.
If needed, you can create a specific search formula in the form Parameters tab.
This formula is used to filter the result set of the default query, and
must return True or False for each document in the result set.
You can access the values submitted by the search form on the REQUEST
object: plominoContext.REQUEST.get('myfield').
Example:
period = plominoContext.REQUEST.get('period')
if period == 'Ancien regime':
    return plominoDocument.year
if period == 'Empire':
    return plominoDocument.year >= 1804 and plominoDocument.year
Note
Search formulas can be a lot slower than regular ZCatalog searches, you must use them carefully.
Search event
If you do not want the default filters of a search page (the view, the
query, and the formula), you can define an onSearch event on the form
Events tab. The formula of this event should return the required
list of documents.
You can access the values submitted by the search form on the REQUEST
object: plominoContext.REQUEST.get('myfield').
Page
Like a Search form, a Page form cannot be used to save documents through
the web, since Page forms do not display any action bar. (Formulas could
however still call save on a document using a Page form.)
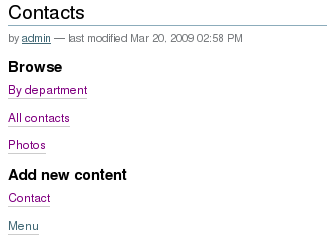
Like any form, it can contain computed fields, actions (inserted in the form layout), and hide-when formulas, so it is a good way to build navigation pages, custom menus, or information pages (like reports, etc.).
Example:

Here we create a page with 3 actions to access 3 different views, but
the last one is enclosed in a Hide-when formula so it will not be
displayed if the current user does not satisfy a given criterium. In the
example, we test if the user has the [dbadmin] role:
"[dbadmin]" not in plominoContext.getCurrentUserRoles()
Result if you are not [dbadmin]:
Result if you are [dbadmin]:
Open-with form
The form used to render a document is determined by a number of mechanisms:
- By default, Plomino document is displayed using the form corresponding to
its
Formitem value (which contains the id of the form last used to save the document). - If the view from where the document is opened defines a
Formformula, the resulting form will be used instead. - And to force the usage of a given form, the form id can be passed in the
request using the
openwithformparameter.
Example:
http://localhost:8080/test/testdb/58862f161ea71732944d37e0a0489cfc?openwithform=frmtest
Accordions and lazy loading
In Plomino it is possible to accordion some parts of the page. This means that the content of the accordioned part will not be visible unless you click on the headline to open the accordion.
It is also possible to avoid loading the content of the accordion until such time as the accordion is opened. This is particularly useful if the content it very big, or if there are many accordions on a page and the reader is interested in only a few of them.
To turn part of a page into an accordion, use this structure (the header level
can be from h2 to h6):
<h5 class="plomino-accordion-header"><a href="TARGETURL">Header</a></h5>
<div>Content</div>
If the class is plomino-accordion-header, the content of the page
referenced by TARGETURL will be substituted for the subsequent div.
Note
Plomino does not currently offer UI support for this functionality. To use it, you have to generate the desired content via Python, or enter it literally into the form layout.
Caching
To improve performances, it might be useful to cache some fragments of a form so they are not re-computed every time.
Cached fragments are set in the layout the same way as hide-when formulas, with
start:cache-identifier and end:cache-identifier markers.
The associated formula is supposed to return a cache key.
When the form is rendered the first time, the resulting HTML contained into the delimited area will be stored in cache and associated with the cache key. Every time the form is rendered, if the cache key returned by the formula matched an existing cache key, the cached HTML is returned.
Consequently, if you use a formula returning always the same value, e.g.:
"financial-report"
the same cached fragment will be served to all the users in all the cases.
If you use a formula which depends on the current user, e.g.:
"personal-report-" + context.getCurrentUserId()
then there will be a different cached fragment for each user (so if the same user displays the form twice, she will received the cached content the second time, but other users would not get that cached fragment, they would get their own cache).
The formula might depend on the date:
"today-report-" + DateToString(Now(), "%Y-%m-%d")
or anything (the document id, any specific item value, etc.).
If the cache key is None, caching is not applied, so for instance:
if context.isEditMode():
    return None
else:
    return "something-read"
would show the cached content in read mode, but would always regenerate the content in edit mode.
Specific CSS or JS
If a form needs some specific CSS or JS, they can be mentioned in the form edit page in the 2 respective textarea fields (one URL per line).
Those URLs can target:
- a file provided in the theme but not enabled in
portal_javascript, - a file contained in the Plomino database
resourcesfolder, - an external file (most likely a CDN URL).
Views
Form formula
You may need to read or edit documents using different forms.
For instance, a person who wants to borrow a book wants different information (book description, category, publication year, etc.) than the librarian (who may want last borrower, return date, availability, etc.).
As explained previously, we can manage this issue using hide-when formulas, action‘s and sub-form‘s.
But if the functional differences are too great, or if the layout is totally different, those strategies will probably produce too much complexity.
In such a case, it is better to create a totally different form (named
frmBorrowManagement for instance).
However, by default the document opens with the form used the last time it was saved.
To open the document with a different form, you need to create a
specific view for borrowing management and use the Form formula
parameter.
This formula will compute the name of the form to use when the documents are opened from the view.
If you enter frmBorrowManagement in Form formula, all the documents
opened from this view will be displayed using the frmBorrowManagement
form.
View template
If you need a specific layout for a view, you can create a ZPT page which can be used instead the default template.
This way, you can build calendar views, Gantt views, produce charts, etc.
To do so, add your Page Template in the resources folder, and enter its name in View Template in the view Parameters tab.
A good approach is to copy the ZPT code from
CMFPlomino/skins/CMFPlomino/OpenView.pt (in the Plomino sources) and
add your modifications.
Note
good knowledge of ZPT is required.
Export CSV
All the views can be exported as CSV. The export contains the value of each column.
Go to the database Design tab, expand the Views section and click the green arrow icon next to the view you want to export.
You can build views specifically for export purposes, you just need to create the columns according the values you want to get in CSV (note: if you do not want this view to be offered on the database home page, check Hide in menu in the view Parameters tab).
Database
Design import/export
You can export or import Plomino database design elements from one Zope instance to another.
This may be useful if you want to deploy a new application from a development server to a production server, or if you want to release a modification or a correction on an application already in production.
To import design elements, go to the database Design tab, and in the Import/Export Design section, fill in the following parameters:
- the URL of the Plomino database which contains the elements you want to import in the current database;
- user id and password corresponding to a user account on the remote instance. This account must be PlominoManager on the remote Plomino database.
Then click on refresh: Plomino will load the list of all the available elements in the remote database.

You can then choose the elements you want and click on Import to import them into the local database.
In some cases (depending on firewalls, proxies, etc.), it is easier to export from the local database to the remote one.
The principle is the same, you just need to use the Export section.
Design export/import as genericsetup resources
Databases can be made available as genericsetup resources. The main purpose for this is to allow them to be used as templates when creating a new database, and so they are referred to as template databases
Plomino defines Export Plomino templates and Import Plomino templates steps for genericsetup.
The export step will search for all Plomino databases contained in the
portal.
If the database has the IsDatabaseTemplate checkbox ticked, its design
will be included in the export.
There is no difference between a database marked as template and any other
database, it merely makes the database available as a template.
The databases are written to folders plomino/<dbid>/ in the exported
resource archive (.tar.gz), where <dbid> is the database id.
Exported database resources can be included e.g. in a Plone skin product.
When adding a new Plomino database to a Plone instance with such a skin installed, templated databases included as resources are offered as starting point for the new database.
This is useful in a hosted environment, to make preconfigured Plomino databases available as two- or three-click installs (add database, choose template, go) as starting point for a user. Once imported, the template forms are part of the user’s database, and edited along with the user’s own forms.
For this use, the hoster would have a source Plone instance containing all the databases that they want to make available together, for example via a specific skin. The source Plone serves to define a group of database templates. Mark all these databases as templates, and export them as a genericsetup resource archive.
Step by step procedure:
- For each database you want to provide as template, go to its Parameters page, and enable Use as a template.
- Go to your Plone portal ZMI / portal_setup / Export page,
- select the Export Plomino templates step, and click
Export selected steps. This produces a
.tar.gzfile. - Go to the Plone site where you want to provide those db templates,
- go to its ZMI / portal_setup / Import page, and at the bottom, import the
previously downloaded
.tar.gzresource archive file. - Now create a new Plomino database in your site. The default welcome page will provide a list of the available templates, so you can pick one and get its design immediately imported in your database.
- the template selection is also available in the Database Design tab.
Refresh a database
After copy/paste of views or forms, or deletion of fields, a Plomino database may be out of date.
If so, you have to refresh the database. This will re-build the database index entirely, and replace all the previously compiled Plomino formula scripts (the first time a formula is called, it is compiled in a Python Script object in the ZODB).
To do so, go to the database Design tab, expand the Others section and click on Database refresh.
Refresh also migrates your database to your current Plomino version (if Plomino has been upgraded since the database was created).
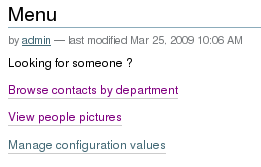
Start page
By default, the database default screen is the generic database menu:
But you might prefer to display something else instead (for instance a view, a page, a search form, etc.).
In this case, go to your database Edit tab, and enter the element id in the Start page parameter.
Replication
You can replicate documents between 2 Plomino databases, possibly on 2 different Zope servers.

There are 3 replication modes:
- push mode
- local modifications are replicated on the remote database;
- pull mode
- remote modifications are replicated on the local database;
- push-pull mode
- both.
If a document has been modified in both the local and remote databases since the last replication, there are 3 conflict resolution modes: - local wins, - remote wins, - last modified wins.
Replication can be useful to synchronize information between 2 servers, or for mobile workers who want to be able to work on a local replica.
Documents XML import/export
In the Replication tab (at the bottom), you can import/export documents from/to an XML file.
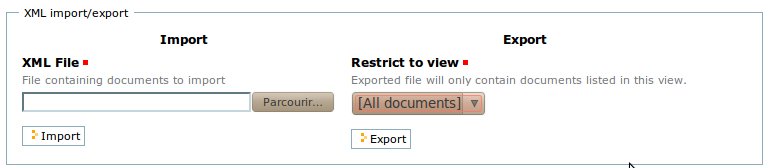
Exported documents can be restricted to a view (meanning that only documents selected in this view will be exported).
Document ids are preserved so if a document already exists in the target database, it is updated and not duplicated.
Note
when importing from XML, the onSaveDocument event is not
called (as document items are all part of the export).
Documents CSV import
In the Replication tab, you can import documents from a CSV file.
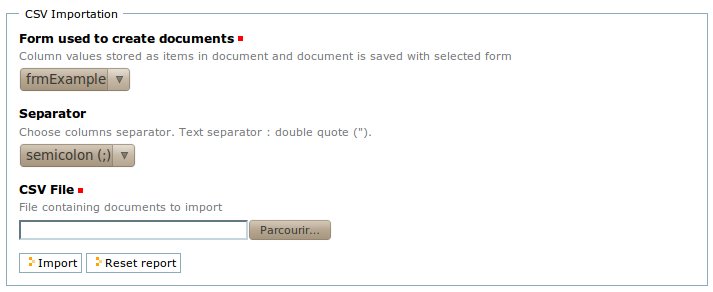
You need to indicate which form has to be used to create the documents.
The first row in the CSV file must contain the field id for the intended column.
Note
when importing from CSV, the onSaveDocument event is called
(as some items might needed to be computed) but the index is not
refreshed to avoid degrading performance. This means that the index
needs to be updated manually, possibly by running an agent that re-saves
imported documents on a schedule, or by refreshing the database on a
worker ZEO client instance.
Plomino URLs
Database
OpenDatabasehttp://server/plone/db/OpenDatabasewill open the database home page which either the default home page, either the start page (if defined in the database parameters). Equivalent to:http://server/plone/dbhttp://server/plone/db/view
DatabaseDesignhttp://server/plone/db/DatabaseDesignwill open the database design tab.DatabaseACLhttp://server/plone/db/DatabaseACLwill open the database ACL tab.DatabaseReplicationhttp://server/plone/db/DatabaseReplicationwill open the database replication tab.
View
OpenViewhttp://server/plone/db/myview/OpenViewwill display the view. Equivalent to:http://server/plone/db/myviewhttp://server/plone/db/myview/view
exportCSVhttp://server/plone/db/myview/exportCSVwill download the view content as a CSV file.exportXLShttp://server/plone/db/myview/exportXLSwill download the view content as an Excel file.tojsonhttp://server/plone/db/myview/tojsonwill return the view content in JSON format.
Form
OpenFormhttp://server/plone/db/myform/OpenFormwill render the form. Equivalent to:http://server/plone/db/myformhttp://server/plone/db/myform/view
OpenBareFormhttp://server/plone/db/myform/OpenBareFormwill render the form without the Plone template. It is useful when loading the form through an AJAX call, considering the Plone skin is not needed in that case, andOpenBareFormwill be more performant.searchDocuments- Only for search forms.
http://server/plone/db/myform/searchDocuments?field1=value1will search and display the search results according the parameters. tojsonhttp://server/plone/db/myform/tojsonwill return all the form fields as JSON.http://server/plone/db/myform/tojson?item=field1will return the form fieldfield1as JSON.Note
the parameter is named
itemand notfieldin order to expose the same signature as the document/tojsonURL, so we do not need to test the context in field formulas.
Document
OpenDocumenthttp://server/plone/db/doc1/OpenDocumentwill render the document in read mode.- Equivalent to:
http://server/plone/db/doc1http://server/plone/db/doc1/view
http://server/plone/db/doc1/OpenDocument?openwithform=form1will render the document in read mode using the specified form.EditDocumenthttp://server/plone/db/doc1/EditDocumentwill render the document in edit mode.Equivalent to
http://server/plone/db/doc1/edit.http://server/plone/db/doc1/EditDocument?openwithform=form1will render the document in edit mode using the specified form.DocumentPropertieshttp://server/plone/db/doc1/DocumentPropertieswill show all the document information and stored items values.AccessControlhttp://server/plone/db/doc1/AccessControlwill show the current access rights and roles in the context of the document.deletehttp://server/plone/db/doc1/deletewill delete the document.http://server/plone/db/doc1/delete?returnurl=an_urlwill delete the document and redirect to the specified URL.getfilehttp://server/plone/db/doc1/getfile?filename=file1will download the attached filefile1.deleteAttachmenthttp://server/plone/db/doc1/deleteAttachment?fieldname=field1&filename=file1will delete the attached filefile1from the fieldfield1.tojsonhttp://server/plone/db/doc1/tojsonwill return all the document stored items as JSON.http://server/plone/db/doc1/tojson?item=item1will return the itemitem1as JSON. In the case of a non-stored item (e.g. a Computed for display field), its value will be computed using the matching field from the document’s form.http://server/plone/db/doc1/tojson?item=item1&formid=form1does the same but the field is explicitly looked up from theform1form (which is not necessarily the document’s form).
Agent
runAgenthttp://server/plone/db/agent1/runAgentwill execute the agent.runAgent_async- Requires ``plone.app.async``.
http://server/plone/db/agent1/runAgentwill execute the agent in asynchronous mode.
Agents
It might be useful to launch the same processing from different places in the application (views action, forms action). To avoid duplicating the code, you can implement the code in an agent.
Select Plomino: agent in the Add item Plone menu, and enter an identifier, a title and the code.
This might be useful to run archiving, cleaning, etc. without giving manager rights to regular users.
By default, an agent runs using the current user access right, but it can also run using the designer (the owner) access right. That way, a regular user might launch an action that would normally require higher privileges if he was doing it manually.
For instance, if an agent is in charge of archiving documents by moving them from the current database to another one, if regular users do not have access to the archive db, they would not be able to put some documents in that db. If the agent is executed as owner, it will not fail.
The agent can be executed (from an action) using the runAgent() method:
db = plominoDocument.getParentDatabase()
db.MyAgent.runAgent()
Note
this method can take REQUEST as parameter (this has to be the
REQUEST object), which allows variables in the query string to be read
and redirection to be controlled (using a REDIRECT key on the
request).
The agent can also be executed from Python formulas by calling it directly:
db = plominoDocument.getParentDatabase()
db.MyAgent('one', 'two', 'three')
Note
this method can take optional positional arguments. It does not redirect.
If you install plone.app.async on your Zope instance, an agent can also be
executed in asynchronous mode.
Resources
A Plomino database contains a resources folder in the ZODB which can
contain useful extra assets:
- images or icons you may need to insert in your forms;
- CSS or javascript files;
- ZPT templates (see view template below);
- Python scripts, to provide a code library usable from the different
formulas (using the
callScriptMethodmethod); - CSV (or other) files containing useful data;
- etc.
To access this folder, go to the Design tab, expand the Others section and click on Resources Folder. It opens the standard ZMI screen, which allows new elements to be added.
i18n support
By declaring an i18n domain in the database parameters, Plomino translation will be enabled.
When enabled, any text enclosed by __ will be translated according the defined i18n domain.
It will apply to form layout static content:
__What time is it?__
would be rendered as:
What time is it?
¿qué hora es?
Quelle heure est-il ?
(assuming you have an i18n domain containing the msgid “What time is it?” and providing the desired languages)
But it will also apply to any computed field output as well:
return context.getItem('the_hour')+" __hours__"
would be rendered as:
6 hours
6 horas
6 heures
If the text does not match any msgid from the i18n domain, it remains unchanged (but without the enclosing __).
The translation mechanism can be called from a formula using the translate
function provided by PlominoUtils, which can be handy in agents or view columns.
Caching
RAM cache
If your Plomino application contains some time consuming formulas, you can
speed up the page display by keeping the result in RAM cache using
getCache and setCache.
Here is an example:
result = db.getCache('my_cache_key')
if not result:
    result = make_something_which_cost_CPU(stuff)
    db.setCache('my_cache_key', result)
return result
The first time the formula will be called, the
make_something_which_cost_CPU will be executed, and the result
will be put into the cache.
Next time the formula is called, the result is directly read from the cache.
As the cache key is a constant (my_cache_key), it will be the same in
all the cases (for all the users, in all the pages, etc.).
But of course, the make_something_which_cost_CPU function might return a
different value depending on the context. If so, you need to produce a cache
key that will reflect this context accurately.
For instance, if the result is different according the user, an accurate cache key could be:
cache_key = "result_for_"+context.getCurrentUserId()
or depending on the document:
cache_key = "result_for_"+context.id
or anything you might need.
Request cache
Another use case is the repeated usage of a same formula in the same page: sometimes, when rendering a document using a form, several computed fields make the same computation (typical example: you display a table of values, and also a bar chart based on those values).
The code itself can be factorized using a script library in the
/resources folder, but it will be run twice anyway when rendering the
page, and this might impact performance.
Unfortunately, setCache and getCache might not be relevant because
you want the formula to be re-evaluated every time a user displays the page.
In that case, you can use setRequestCache and getRequestCache, so
the cache will be
associated with the current request, and will only last as long as the
request:
result = db.getRequestCache('my_cache_key')
if not result:
    result = make_something_which_cost_CPU(stuff)
    db.setRequestCache('my_cache_key', result)
return result
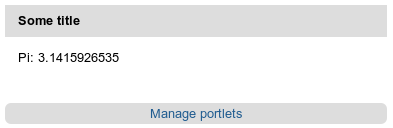
Plomino Element Portlet
A portlet displaying a Plomino form can be added anywhere in a Plone site. It can be useful to show information, like statistics or charts (thanks to Google Visualization, for example), computed when the page is displayed.
Note
In Plone, when you add a portlet to a page, all of its children pages will contain it too. For example, if you add a portlet to the main page of the site, it will be displayed in every page of the site. You can prevent this mechanism in a child page: click on Manage Portlets in this page, find the selector next to the name of the portlet (e.g. Plomino element portlet), and select guilabel:Block.
You can add a portlet on a page with few steps:
- Click on the link Manage portlets
- In the Add portlet... selector, choose the Plomino element portlet option.
A new page appears, with some fields:

- The header field sets the title of the portlet.
- The database path is the path of a Plomino database containing
the form to be displayed. If the base is accessible at the URL
http://example.org/Plone/database, the path is/Plone/database. Since there is always an exception to a rule, you have to be careful when the site URLs are re-written (e.g. if the Plone site is behind an Apache server). The path must be the Plone site path, not the public URL. - Element ID is the form identifier (set at its creation) in the database specified previously.
The new portlet is now displayed alongside the page.
You can control whether the portlet must be displayed or not by adding a field named Plomino_Portlet_Availability which formula must return True or False.
Extending Plomino with plugins
Plomino provides a set of utility functions in PlominoUtils
(DateToString, asUnicode, etc.).
In addition, custom Plomino utilities can be declared in a custom package, and they will be available from any Plomino formula.
Example:
Create the utility methods in your extension module (e.g.
mypackage.mymodule):
import simplejson as json

def jsonify(obj):
    return json.dumps(obj)

def dejsonify(s):
    return json.loads(s)
Create a class to declare them:
class MyUtils:
    module = "mypackage.mymodule"
    methods = ['jsonify', 'dejsonify']
Declare the module as safe so it can be called from Python Scripts (all Plomino formula are Python Scripts):
from Products.PythonScripts.Utility import allow_module

allow_module("mypackage.mymodule")
And register it with Plomino in a configure.zcml file:
<utility
      name="MyUtils"
      provides="Products.CMFPlomino.interfaces.IPlominoUtils"
      component="mypackage.mymodule"
      />
Now, jsonify and dejsonify can be used in any Plomino formula.